
SO...HOW DO I FORMAT MY FILE FOR THE RISOGRAPH AGAIN?

The first step to being good at something is being bad at something, and you've come to a great place to do it. This is all about how to take a photo (or an illustration) and convert it into a four-color risograph print, using Aqua, Fluorescent Pink, Yellow, and Black inks. You will need:
Adobe Photoshop (or something similar)
A photo/illustration/image
An emotional support snack or beverage* (*technically optional - but I'm here to have a good time, thank you.)
For today's example, I'll be using this illustration:

This is a completed digital illustration that I made in Procreate, inspired by the different kinds of mushrooms in Legend of Zelda: Breath of the Wild, and Tears of the Kingdom. The wide range of hues makes this an ideal candidate to show off how you can still create full color images using the risograph printer!
To start off with, we need to open this image in Adobe Photoshop, and begin by changing the color mode of the image. We can do this by going into Image > Mode > and we'll select CMYK instead of RGB.

RGB is standard for images being viewed on screens -- but CMYK (cyan, magenta, yellow, and key - aka black) are the colors we use to mix inks together on the risograph. This allows us the full range of hues - all up and down Roy G. Biv's street.
Once our image is converted to CMYK, we're going to be using the Channels window.

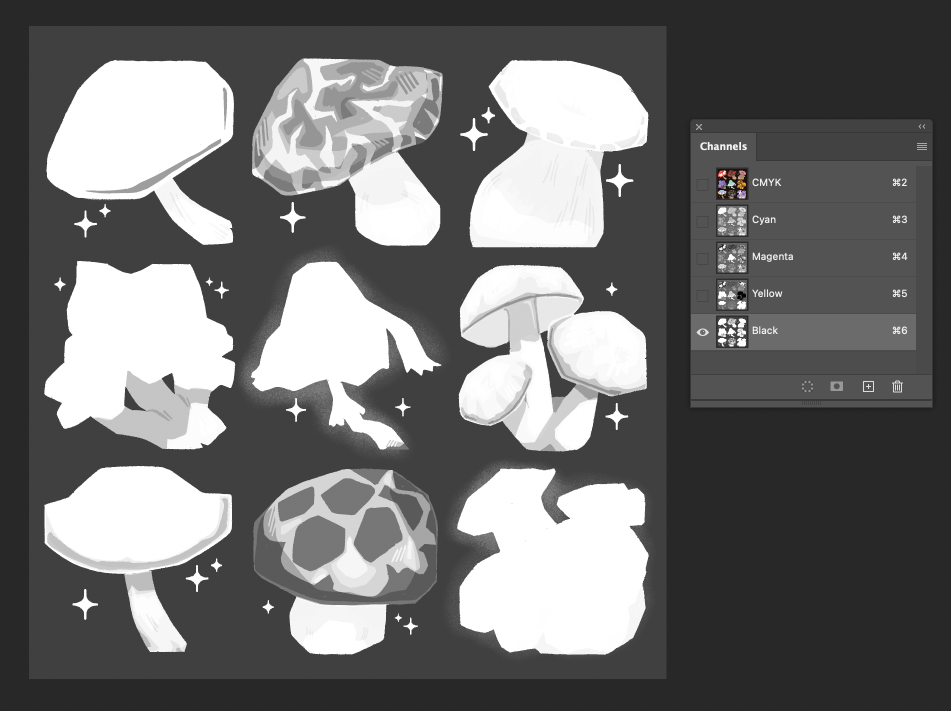
In Channels, we now see five layers - one with all of our image's information, and four others; each is named after the information it's stored about the image (cyan = all the cyan in the image, so on so forth).
Select the Cyan layer.

See how the image looks greyscale? Areas that are white have 0% cyan -- areas that are that darker gray have a higher concentration of cyan. Any areas that are 100% black is where 100% cyan ink would be placed while printing on the risograph.
Likewise, if you look at the other layers - notice how the black layer is mostly concentrated outside of the mushrooms for our black background?
So.
Now we need to get all of these layers (with the exception of the 'CMYK' layer) into individual documents so that we can convert them to the appropriate textures for printing on the risograph (this process also applies to screen printing).
To do so, we're going to start on one of our individual layers (I'll be starting with Cyan).
Select the layer you are going to Copy.
At the bottom of the Channels window, select the option that looks like a dotted-line circle.

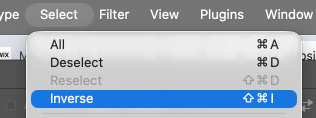
At the very top of your Photoshop window, go to Select > Inverse.
In the Layers window, create a New Layer. (Your image will go back to full color - that's okay!)

Using the Paint Bucket Tool, make sure your foreground color is set to black, and bucket fill the selection on your new layer.
Rename 'Layer 2' to 'Cyan'.
This step is very important before repeating the process: turn the visibility on your Cyan layer off. Otherwise, this will mess up the values of the other layers that we're going to grab.
Repeat those steps to create a new layer for each color, bucket filling in your inverted selection each time. Remember to name your layers to stay organized - you don't want to accidentally print your cyan layer using yellow ink!
Once you've finished repeating those steps, this is what your Layers window should look like with all of your layers visible:

Yay! Now, we'll start taking these layers and putting them into new documents so we can have each layer separated.
Select the layer you'd like to create a new document for (I will be starting with black). Copy the entire layer.
File > New > Document from Clipboard (this will make the document the size of the image we've copied - I know mine fits within the printing area of the risograph. Make sure your document is converted to the correct size for printing beforehand).
Paste your layer into your new document.
At the top menu in Photoshop, navigate to Image > Mode > and select Grayscale. When prompted, you can select 'flatten image'.
Complete this, in separate documents, for every layer. Remember to name your documents as you go to keep the layers organized!
Now, with all of our four layers divided and set to Grayscale, we need to talk about textures. When printing on the risograph, the printer doesn't print large, solid swatches of ink - this tends to jam the printer - but it actually uses either a halftone texture or images with a diffused texture.

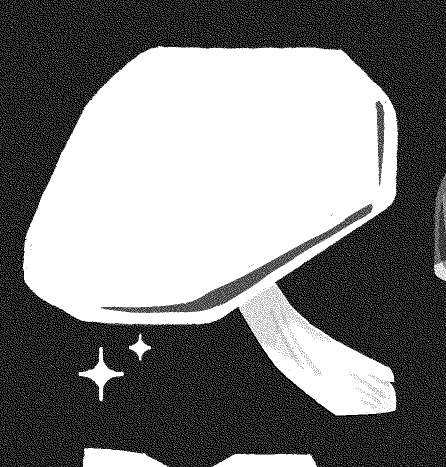
The image on the right uses a halftone texture, set to 150 dots per line. This results in a finer, smaller dot-pattern.
You can also set your half tone texture to be larger - you just decrease the number of dots per line. (We'll talk more about how this works in a second).
This one, on the other hand, uses difussion. See how the texture looks a bit more like sand - rather than uniform dots? With diffusion, you don't get to set the density -- it just automatically applies (unlike half tone textures, where you need to decide the angle and the density of your dots).
What texture you decide to use is entirely up to personal preference - some like the way that diffusion looks better for large, fill-in areas, whereas some prefer the pattern/texture of the half tones. We'll go through how to set up your file using half tones first - and then diffusion.
SETTING UP YOUR LAYERS WITH HALF TONES
Remember reading comics in the Sunday newspaper? No? Well, you really should check out Marmaduke sometime. He's a very silly dog.
If you are familiar, then you might recognize that when using a half tone texture to create a large range of hues and values, the dots don't print over each other - they overlap at different angles in order to allow our eyes to optically blend the colors, since they're so close together.

This image, courtesy of Wikipedia, shows how you can set each color to a different angle - the resulting circle that begins to form from the dots overlapping is how both screen printing and risograph printing can achieve such a wide range of colors while only using 4 colors of ink.
To begin converting our images, we need to once again change the Image mode.
Image > Mode > Bitmap

Select 'Halftone Screen', hit 'OK'

Frequency: this decides whether your halftones will be small dots or large dots. The closer the number is to 300 = the smaller the dots. (Keep in mind - print standard is 300 dots per inch). I will be setting mine to 80.
Angle: Following one of the examples from above, decide which you'll use, and apply the angle accordingly. For example, I will be using the top left image as my angle reference, so my black layer will be set to 45 degrees.
Shape: I have mine set to 'Round', but you can change this - it's one of those options that's again, up to personal preference.
Hit 'OK'.
This is now what my black layer looks like:

We repeat this process for all of our layers, putting them into separate documents, matching the angles to the appropriate layer. (Cyan = 15, Magenta = 75, Yellow = 0).
If we were using the diffusion settings instead, you follow the same steps (instead changing Halftone Screen to Diffusion Dither) - but you don't need to adjust the angle or the number of dots per line.

Once that's been completed for all four layers, the last step is to save all of your images and put them together in a multiple page PDF. To do that:
File > Save As > Photoshop PDF - for ease, continue to stay organized (unlike me) and name your document after the color layer you're working on.
Repeat step 1 for each layer as a separate Photoshop PDF. You'll have 4 total files in the end.
Combine your multiple PDFs into a single PDF. This can be done using Adobe Acrobat -- there are other various online websites and services that will also offer to combine multiple PDFs into one, but I bet those might also come with a risk of some sort of malware - tread those seven seas at your own risk, sailor.
IMPORTANT WHEN PRINTING WITH PAPYRJAM: When combining your files into a single PDF, make a separate word document (in any program) that lists what ink colors are being used for each page. Example format:
"<Customer name>, <File name>.PDF
pg 1 - Cyan
pg 2 - Magenta
pg 3 - Yellow
pg 4 - Black"
Rejoice! You've now made a single PDF that should have 4 pages (one for each layer) in your document. Save this with whatever naming conventions you like! Get disorganized even! (Don't do that. That's terrible advice and only a middling joke at best).
From this point, if this was a print job you were submitting to us (👀), this is the document that you would upload on our website when completing your order!
Interested in getting something printed with us? Submit your order at PAPYRJAM.SHOP! Still feeling confused? Consider booking a private lesson, and you can get hands-on, in-person help to answer all your questions. ★


Comments